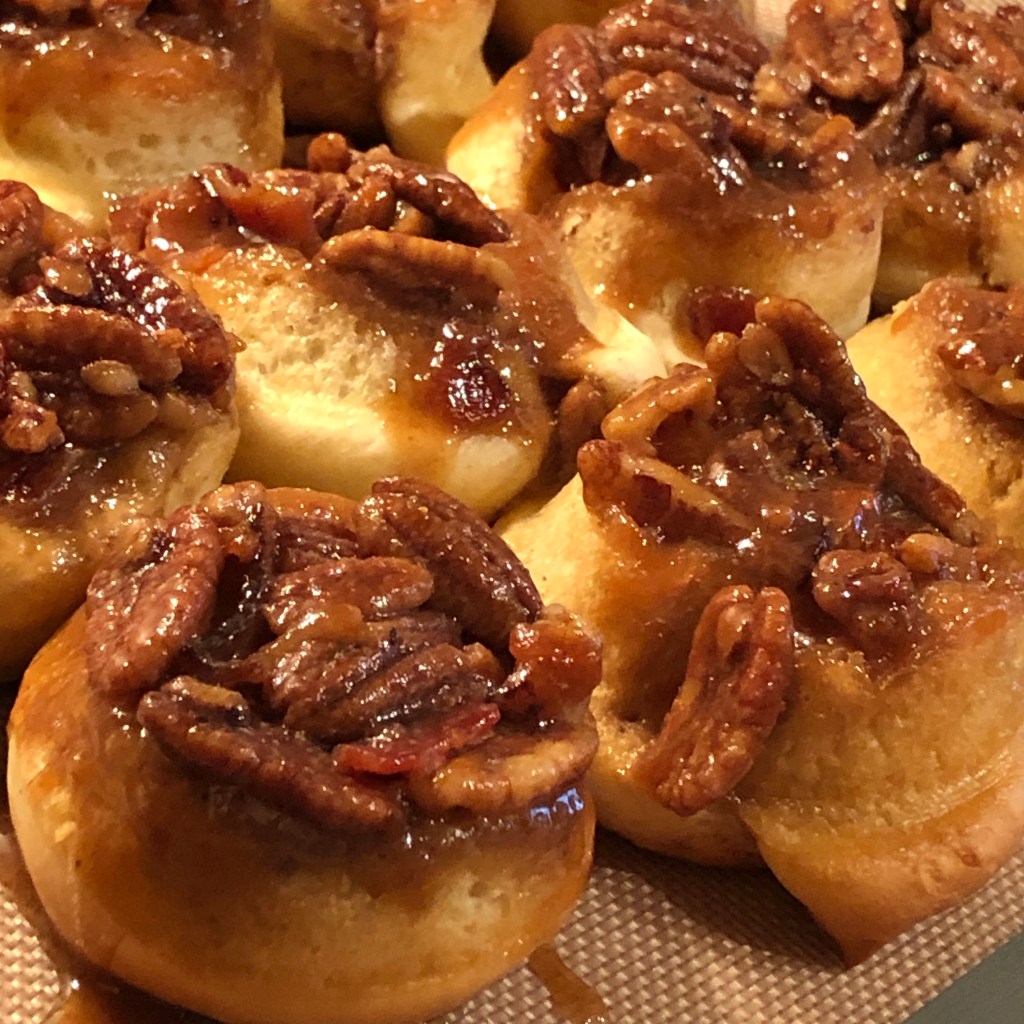
Have you ever met anyone who doesn’t like bacon? Ever? I actually know some vegetarians who sneakily eat bacon! And, while it’s fine if you don’t eat it for sure, it’s just a given that bacon makes just about anything taste better.
That goes for these insanely delicious sticky buns! It’s not a lot, so if you are a little skeptical, just know it adds just a hint of salty umami that makes these so decadent and special. I personally love salty and sweet mixed together, and these hit that sweet spot, pun intended!
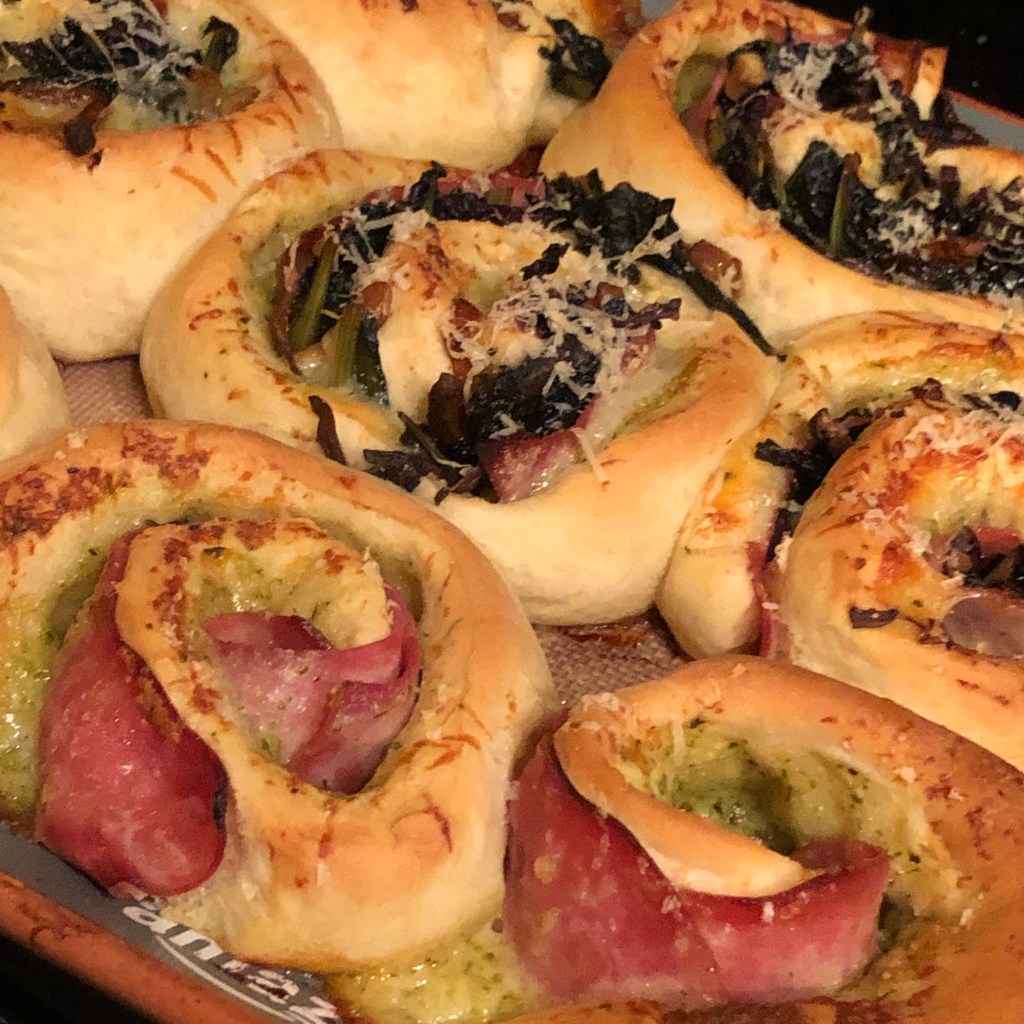
The best part about these too, is that you don’t have excessive proofing and waiting, so you can make them all in one day, unlike a lot of tricky recipes I have seen. And, if you don’t want to do them this way, you can also switch it up and use the versatile dough for other sweet or savory recipes. I have used it for both, and it comes out incredible every time!


Ingredients for Dough:
- 1c warm milk
- 1 Tbs instant dry yeast
- 2 Tbs granulated sugar
- 1 tsp salt
- 3 Tbs salted butter, softened
- 1 large egg
- 3c all purple flour
Ingredients for Bacon Candy:
- 8 slices thick slab bacon
- ~1/4c dark brown sugar (enough to sprinkle over bacon)
- 1 T maple syrup
Ingredients for Filling:
- 1/2c salted butter, softened
- 1c dark brown sugar
- 2 Tbs ground cinnamon
- 1-2 Tbs maple syrup
- pinch of salt
Ingredients for Topping:
- 1c heavy cream or half & half
- 3/4c brown sugar
- 4 Tbs maple syrup
- 2c pecans, roughly chopped or left whole
Instructions:
- In a large bowl (if mixing by hand) or in the bowl of a stand mixer, combine warm milk, yeast, sugar, salt, butter, and eggs. When combined, add in flour and mix on slow speed or bring together with a wooden spoon.
- Once the flour starts to incorporate into the dough, bring the speed up to medium in the mixer. If mixing by hand, you can use your hands and knead the dough in the bowl until the dough comes together (you might need additional flour to get there). Dough should be soft and somewhat tacky, but not stick to your hands.
- Once you have reached this consistency, transfer the dough to a lightly greased mixing bowl (I like to use olive oil in a misting spray or oil spray from the store for even coating). Cover bowl with dish bowl and let rise about an hour, or until the dough has doubled in size.
- While the dough is rising, cook bacon in a fry pan until crispy on both sides. Drain fat from bacon (reserve to use for another dish or discard), and bring bacon back to pan. Sprinkle bacon with ~ 1/4c brown sugar (you can use less, you just want enough to cover and caramelize) and about 1T maple syrup just for flavor, and continue to cook until sugar melts and starts to bubble. Make sure to do this on both sides. Let bacon cool and form a candy. Once cool and brittle, break into small pieces and set aside. You can leave the bacon in the pan to use later and mix the topping there to save dish time and also to get all the little bits of sugar, bacon fat and flavor from the pan.
- At this point, you want to grease whichever baking surface you are using with either butter or cooking spray. I like to use a metal muffin tin for these to make somewhat uniform in size and for easier portioning, but you can also do all together in a baking dish as well. If you are using the muffin tin, you will get 24 sticky buns, but if you want to make the buns thicker and larger in size, you can do that when making in an open dish like a brownie pan or glass baking dish.
- To make filling, combine softened butter, brown sugar, cinnamon and 1-2 Tbs maple syrup to form a paste. Set aside.
- Punch down dough. If using a muffin tin, cut dough in half. If using an open baking dish, you can use full amount at once. Simply repeat the following steps for the duplicate dough for the muffin tins.
- Roll out your dough to 12″x18″. I like to use the back of a cookie sheet as a rough idea of size. You don’t have to be exact, but you want to be as uniform as possible and get the dough as close to the edges as possible without getting too thin. If any pieces rip, just press back together.
- Smear 1/2 of the filling onto the dough if using the muffin tins, or the full amount if using the open dish, evenly spreading the filling all the way to the edges of the full amount of dough. Sprinkle half of the bacon candy evenly distributed throughout the dough.
- Roll the dough in a pinwheel away from you, doing a little at a time in sections, and making sure to keep the rolled dough as even as possible. It really doesn’t have to be perfect.
- Carefully move dough to center of baking tray or floured surface, and cut in 12 even pieces. If making in muffin tray, repeat steps 8-10 until you have 24 uniform rolls.
- In pan with remaining bacon candy, add all of topping ingredients to pan and stir until incorporated. Do not heat, simply use fry pan as mixing dish.
- Spoon each muffin tin with 1-2 spoonfuls of topping mixture, enough to coat the bottom and fill the first 1/4 of the tin. If using a single pan, simply pour all ingredients onto bottom of dish.
- Preheat oven to 325 degrees. Place one roll into each tin of muffin tin or evenly spaced in baking dish, and cover with a towel to rise for 30-45 minutes.
- Bake the rolls for about 14 minutes, or until brown on top.
- Let cool on a wire wrack for 10 minutes and then place a serving dish over the baking dish and flip. You might have to gently shake, but buns should come out easily, and as you remove the baking dish, all the gooey delicious topping should ooze out and fall all over the top, dripping down each bun and creating that amazing sticky, caramelized texture.
These can be enjoyed hot out of the oven with a scoop of ice cream, a dollop of whip cream, or just by themselves. They work great room temperature as well, and even freeze great to enjoy later. Simply pop into the microwave for 30 seconds and they are just as good as when you first made them!
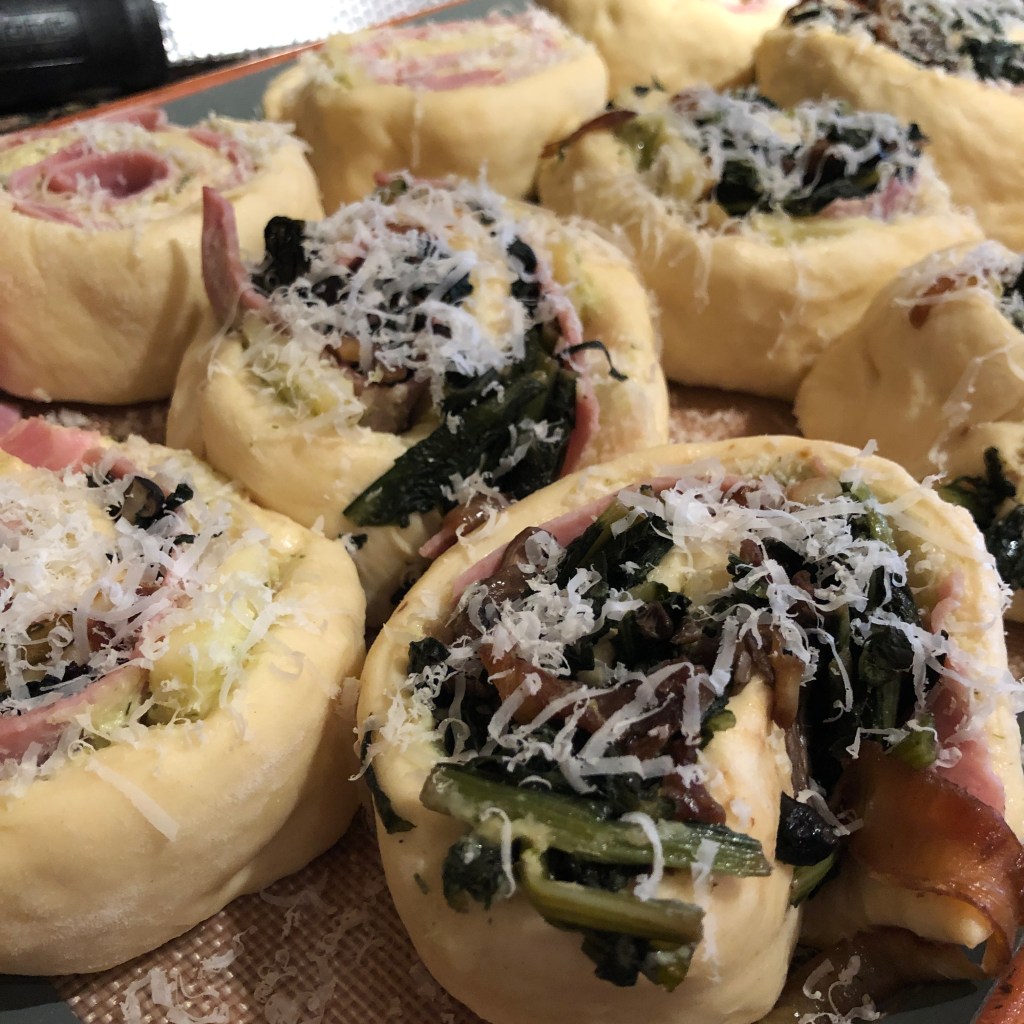
For savory buns, I simply baste the dough with butter and spices, sprinkle with cheese, and use an array of fillings, from provolone and olives, to ham and cheddar, to sautéed greens and parmesan. There are endless possibilities!
To add to your Yummly Recipe Box, click the Yum Below: