A Pinch and a Dollop

A Journey To Health, One Bite at a Time
A Pinch and a Dollop
  • About
  • Breads & Pastries
  • Veggie Sides & Salads
    • Cheesy Savory Quarantine Hash

      Posted at 7:11 pm by pinchdollop, on June 6, 2020

      You know the drill… another day at home, another boring meal! Wrong! There really is nothing boring about brunch, even if you cannot go out with friends! Cheesy eggs, tangy avocado, and luscious potato hash: sounds like a great morning to me! Especially if you pair it with a mimosa or glass of bubbly! This brunch hits all the notes and provides a real comfy weekend meal.

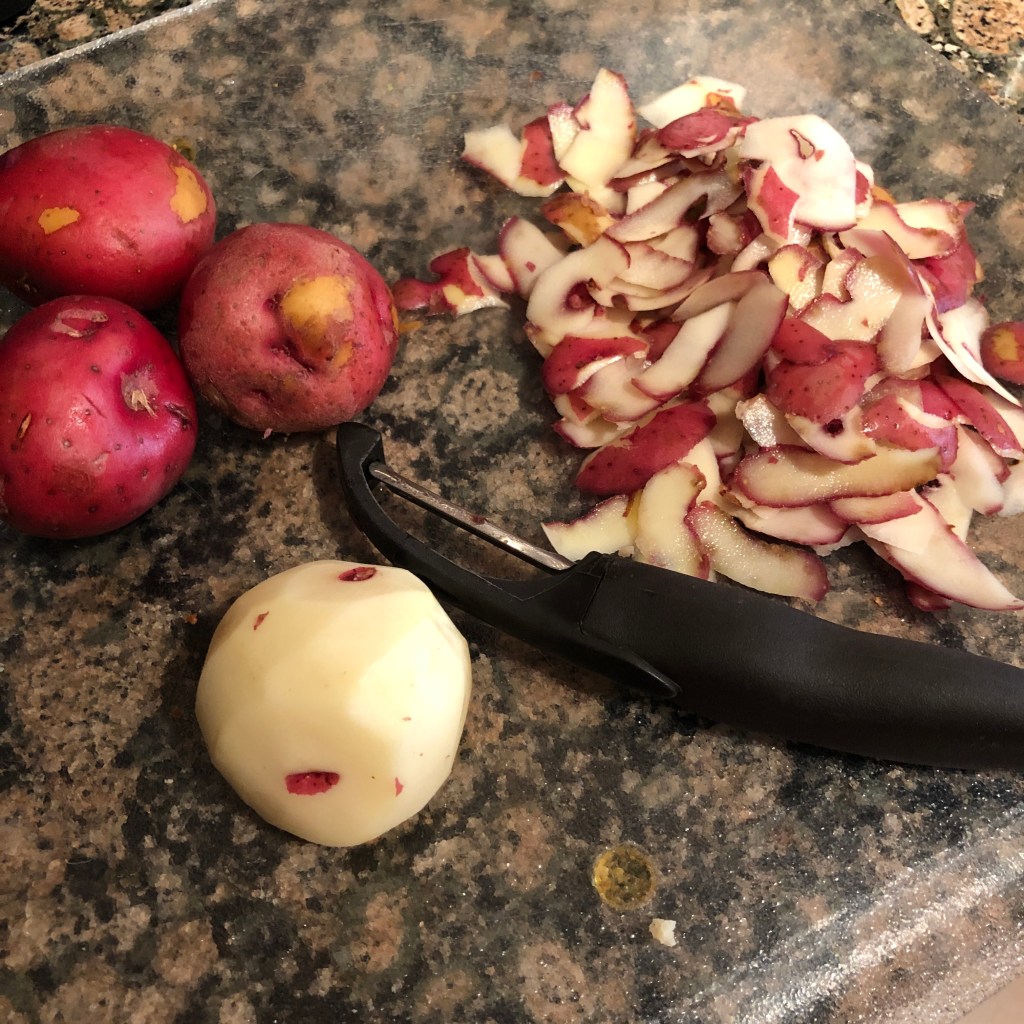
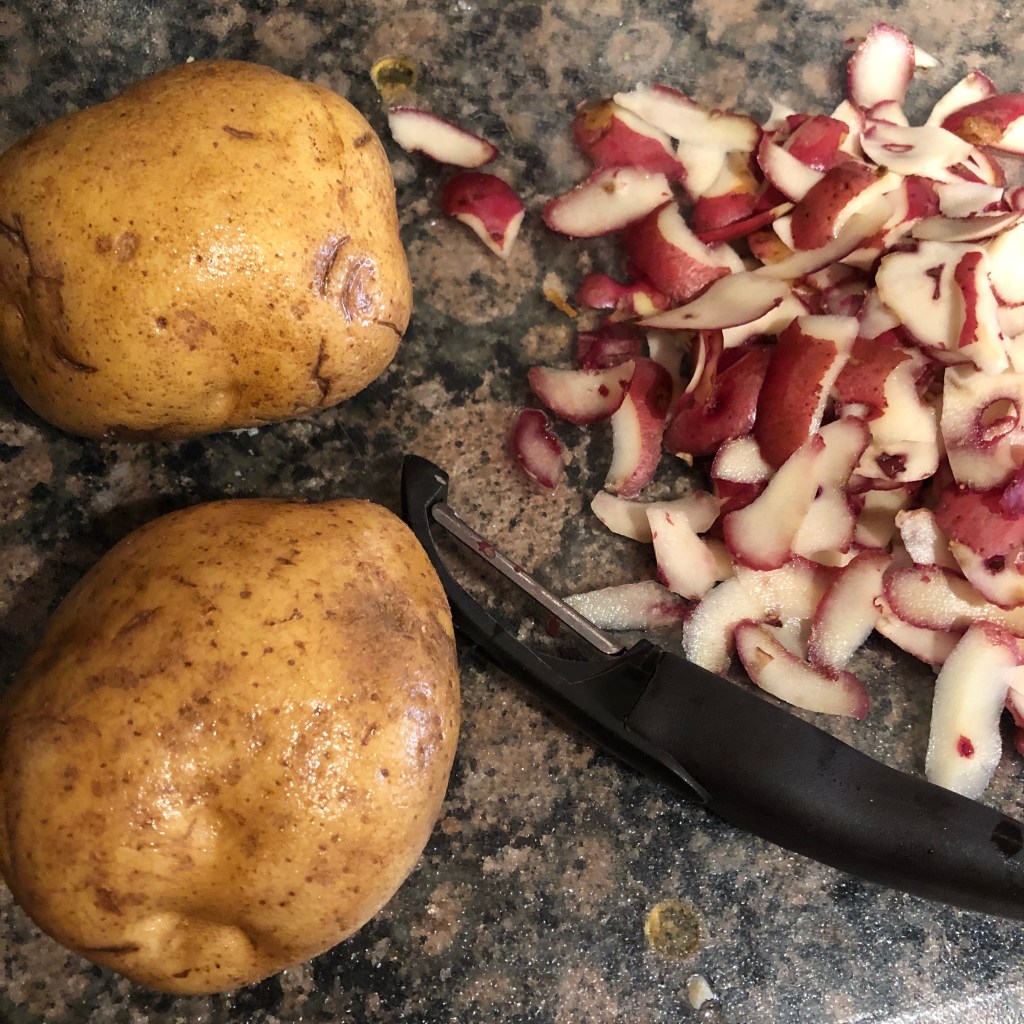
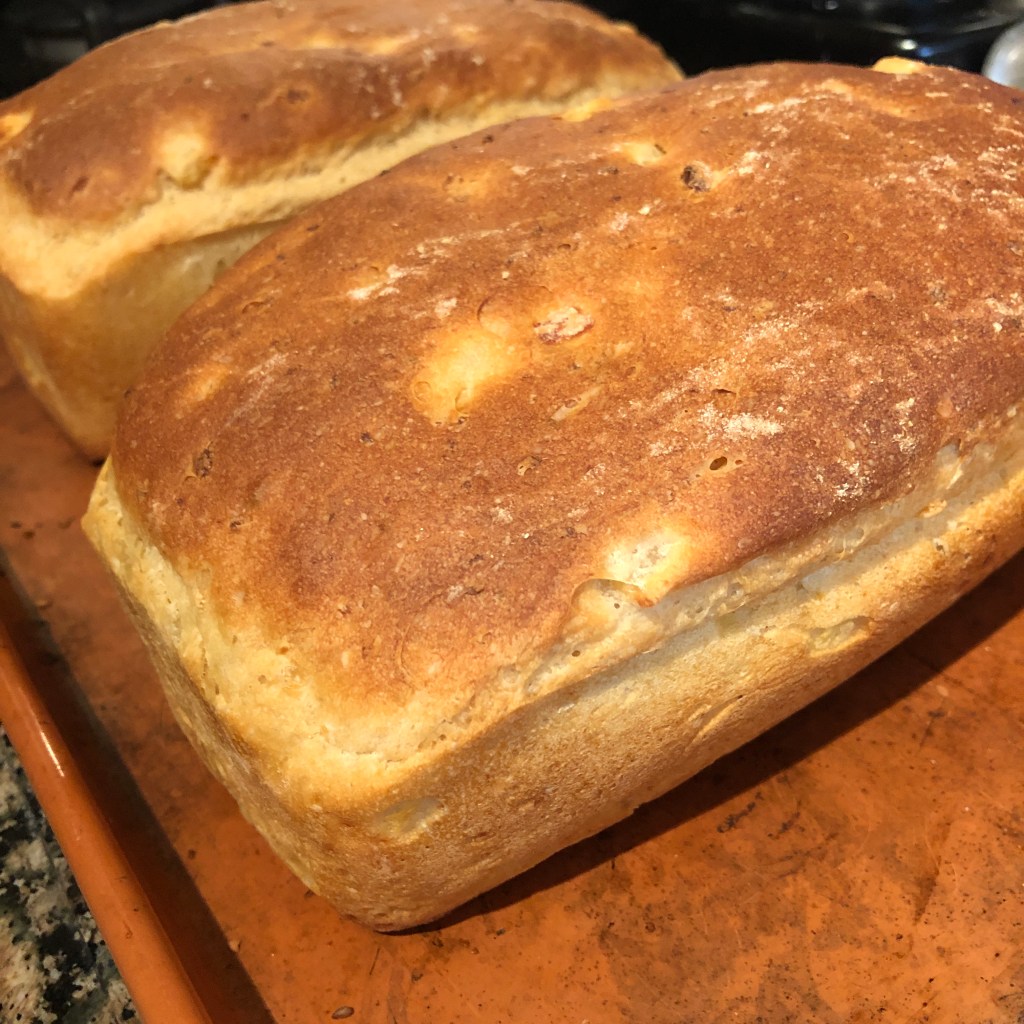
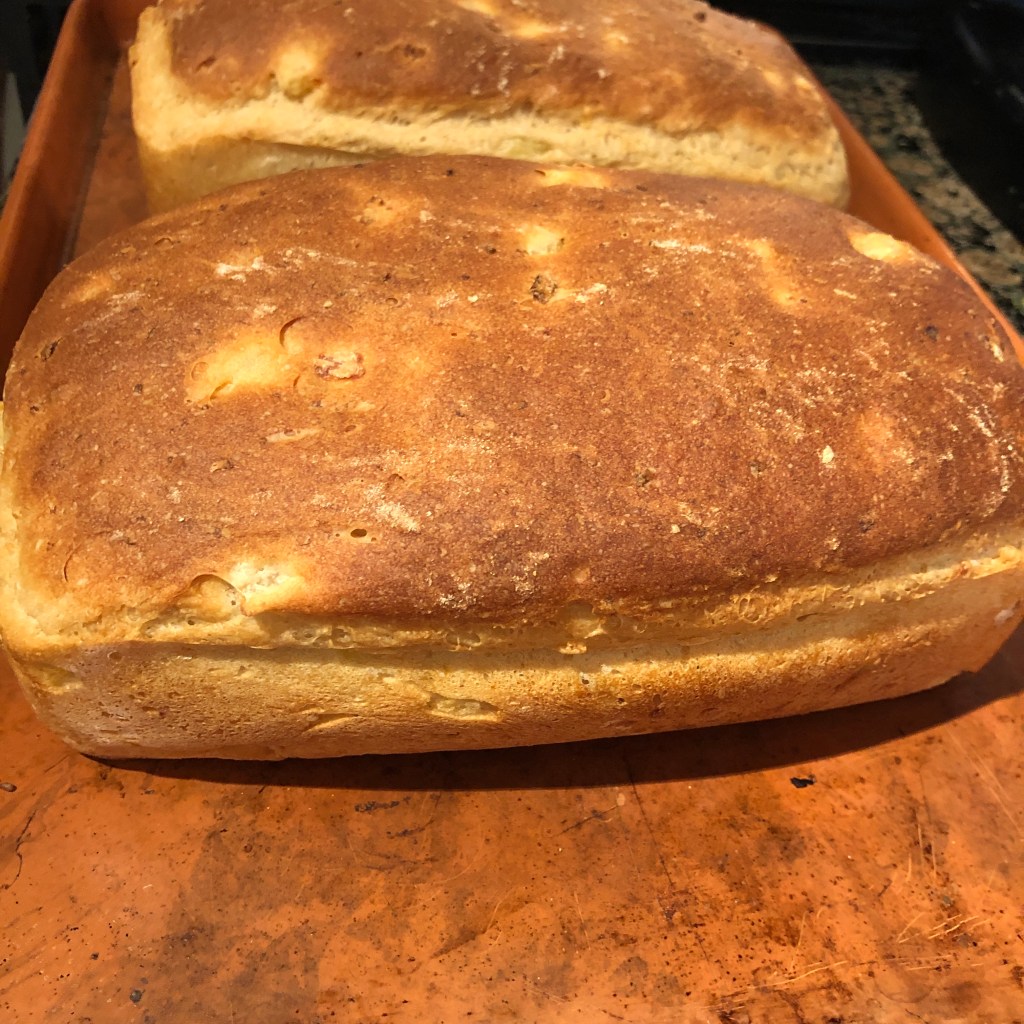
      Using the discarded peels of the potatoes I peeled for the Potato Bread, you can use all the delicious bits and get a really filling, luxurious meal. Dress it up or down, sub or add any of your own favorite flavors and you will not be disappointed!

      Ingredients:

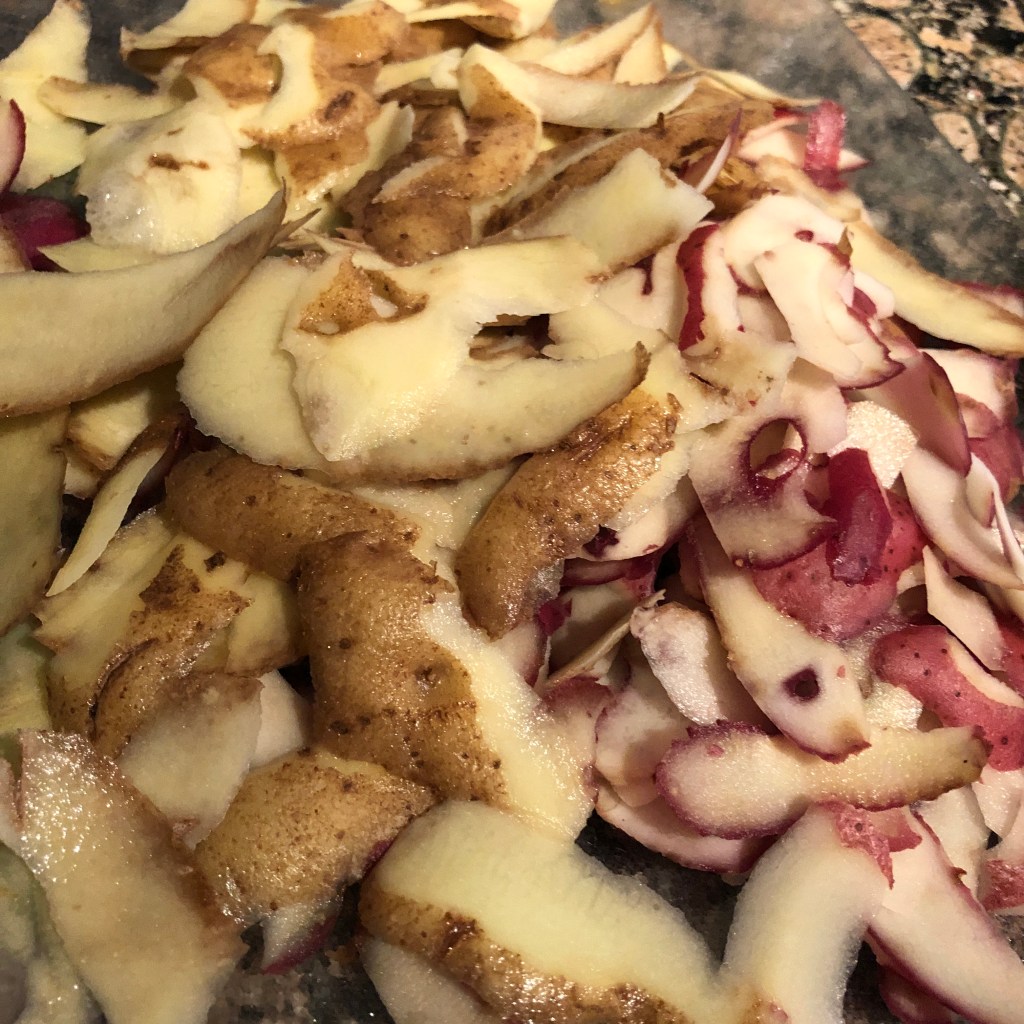
      • Peels from 3-4 large potatoes, or equivalent
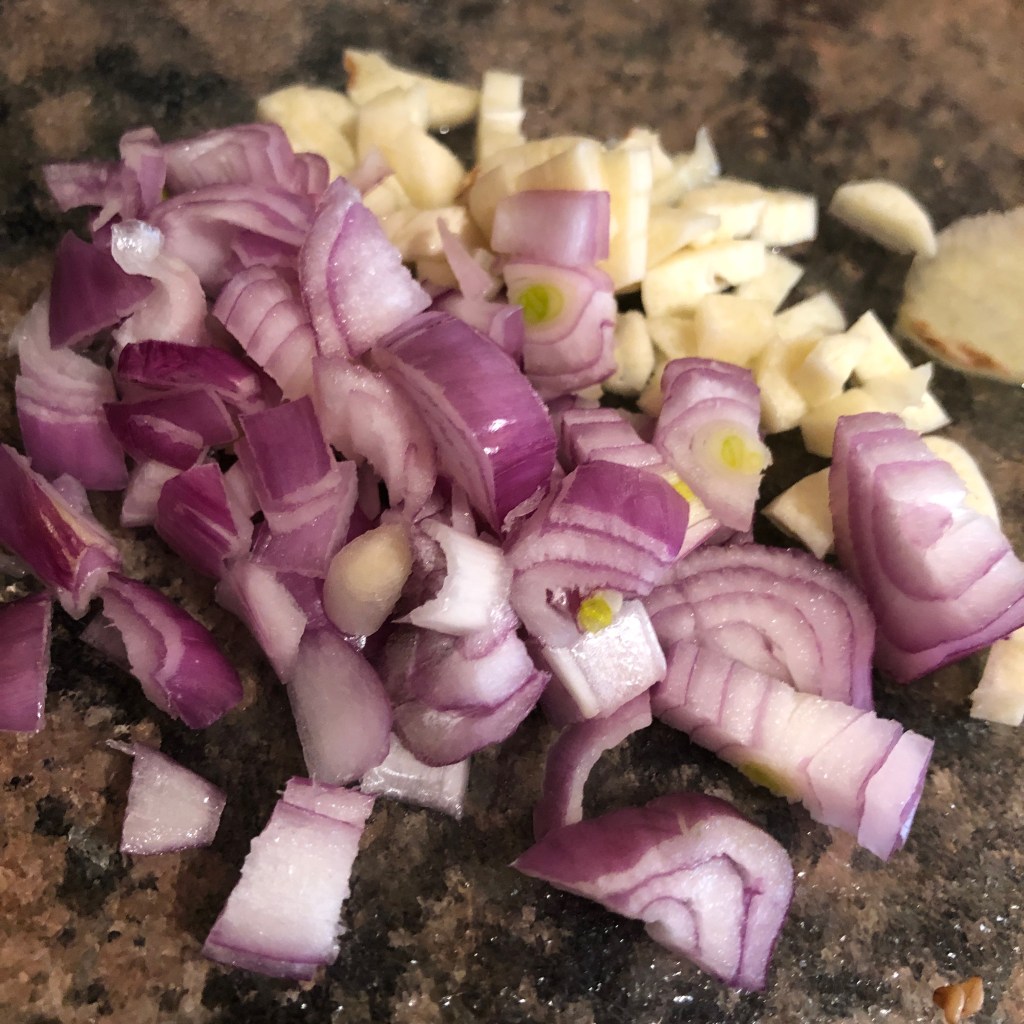
      • 1 shallot or 1/2 small onion, finely chopped
      • 1 clove garlic, finely chopped
      • 2 eggs (1 per person or more if you desire)
      • 1 avocado
      • 2 slices cheddar cheese
      • splash(es) of green tabasco sauce
      • olive oil
      • salt & pepper to taste
      • garlic powder to taste
      • ~1/2 tsp thyme

      Directions:

      1. Add about 1 Tbs of olive oil to medium skillet on medium high heat. Let heat until pan is very hot, and then add shallot/onion and garlic, sautéing until golden brown. Stir often.
      2. Once onions and garlic are browning, add potato peels, a pinch of salt and pepper, and thyme. Let potatoes cook without stirring until bottom layer browns and forms a crunchy layer. At this point, stir potatoes/onions and leave to continue to brown other potatoes. Repeat until the majority of the potatoes are browned and crusty.
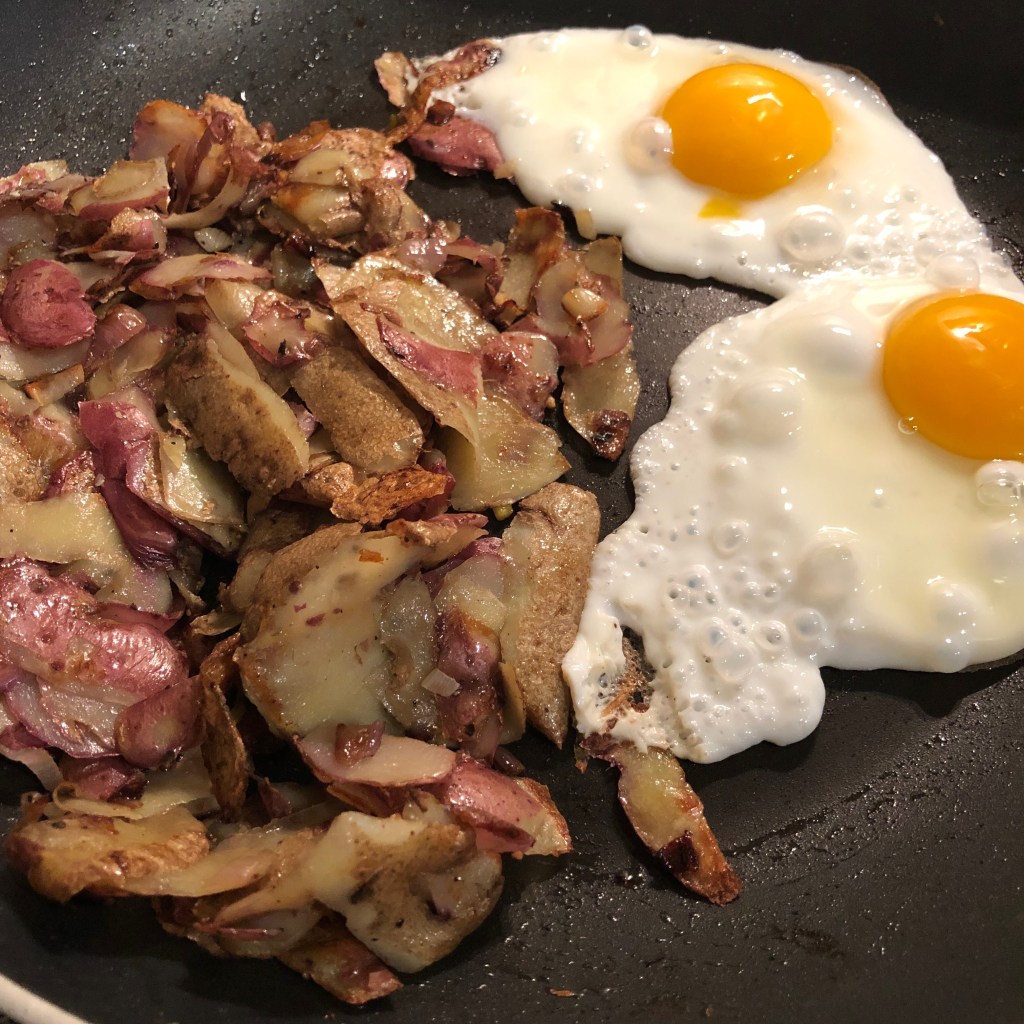
      3. You can use a separate pan to cook the eggs while potatoes are cooking, or simply move over potatoes to one side of pan and crack the eggs into pan to fry. If doing more than two eggs, you might prefer to use two pans; I simply hate having more dishes to do!
      4. Cook eggs either sunny side up or fried over. Add cheese on top of each egg, cover to let cheese melt.
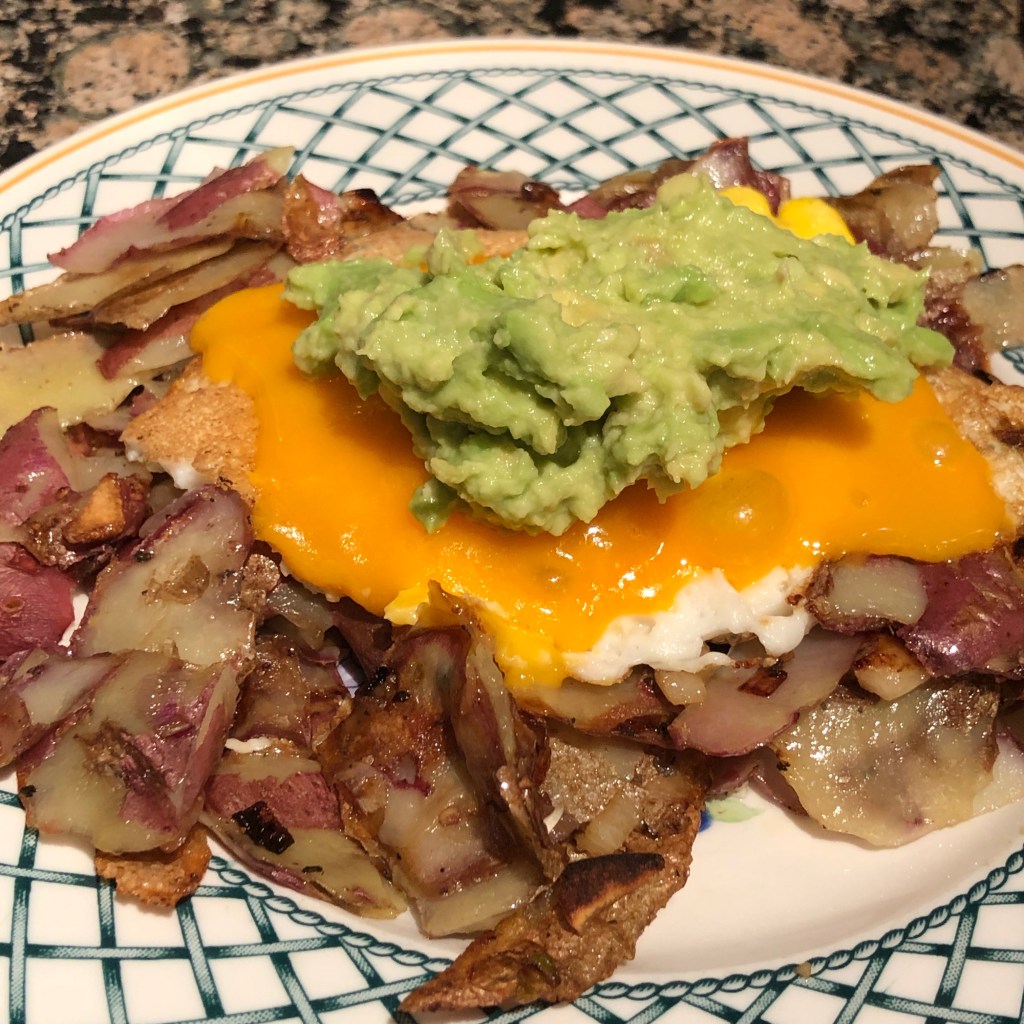
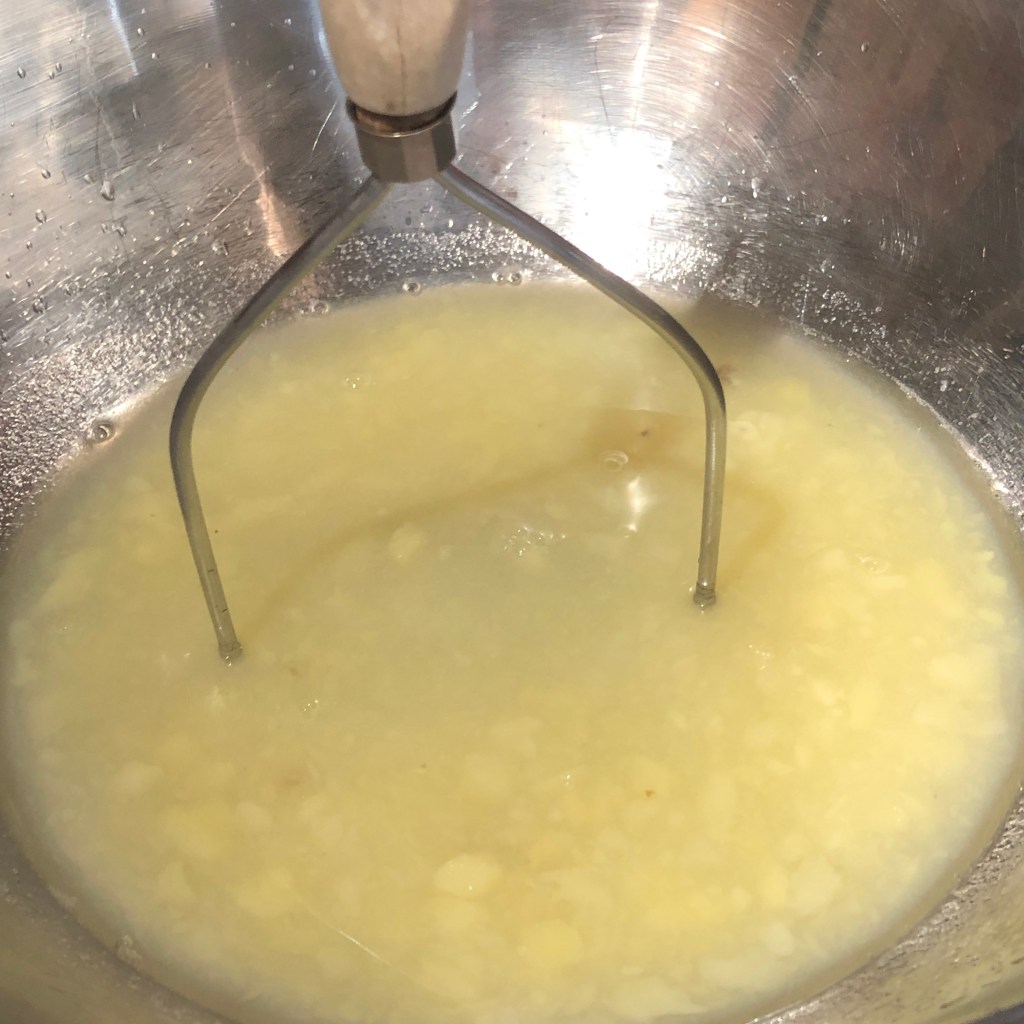
      5. While eggs are cooking, halve and spoon an entire avocado into a bowl. Mash until lumpy or smooth, add a pinch of salt and a few splashes of Tobasco sauce.
      6. Divide potatoes on two plates, place egg(s) on top, and top with half the avocado mash. Enjoy!
      Posted in Uncategorized | 0 Comments
    • Best Intentions

      Posted at 2:35 pm by pinchdollop, on June 6, 2020

      This morning, I woke up with the intention of making a green smoothie. It was all I could think of yesterday; the fridge is packed with fresh produce (and I mean packed)!

      I went for a long walk, I had an ice coffee. I thought about making doughnuts, then ate 3 peaches and a handful of chocolate. No smoothie. So, I guess there is a win in there somewhere! Maybe for lunch…

      Posted in Uncategorized | 0 Comments
    • Bacon Cheeseburger Dumplings

      Posted at 6:54 pm by pinchdollop, on June 5, 2020

      Want to wow a crowd or your family with a super fun play on a classic? Make these mind bending dumplings, and they are sure to be a hit! Great for getting kids in the kitchen (and eating what they make), and these make a small amount of ingredients stretch really far! An easy way to impress and get to enjoy your favorite things in a new, fun way!

      I am obsessed with making dumplings lately. You can literally put just about anything in them. And, while I don’t usually eat red meat for personal reasons, I sometimes get a craving for a burger. These satisfied both of my cravings at once!

      I just threw this all together, so I am approximating measurements. Feel free to add or omit things you love or dislike on your own burger, and you can even make these vegetarian with meatless meat. You can’t really mess this up! You can use the dipping sauces or make up your own. Some people like to dip in ketchup or eat plain. All depends on what you like on your burger.

      This makes 50 dumplings.

      Ingredients:

      • 1 lb ground meat of choice. (I used grass fed beef, but you can mix it up according to what you prefer for a burger)
      • 1 pkg premade dumpling wrappers (I prefer round shape to square, but you can use either kind)
      • 1/4c ketchup
      • 1/4c mustard
      • 1 pickle, finely chopped
      • 2 slices cheddar cheese, finely chopped (or 1/2c shredded)
      • 2 oz blue cheese, crumbled
      • 1 shallot or 1/2 small onion, finely diced
      • 2-3 slices good quality bacon
      • salt and pepper to taste
      • garlic powder to taste
      • 1-2 Tbs Olive Oil
      • 1/2c water for cooking
      • 1/4c water for sealing dumpling skins
      • any extra herbs you might like to season your burger with

      Dipping Sauce Option 1:

      • 1/4c ketchup
      • 1/4c mustard

      Dipping Sauce Option 2:

      • 1/4c ketchup
      • 1/4c mayonnaise
      • 1/2 small pickle

      Directions:

      1. In small skillet or fry pan, over medium high heat, fry bacon until crispy. Remove bacon from pan, and drain on paper towels. Leave grease in pan.
      2. With pan still on, lower flame to medium, and add shallots or onions; fry in bacon grease until golden brown.
      3. While onions are frying, add all other ingredients to a medium bowl. Crumble up bacon into small bits, and add to bowl. Add in shallots/onions, including the bacon grease.
      4. Mix everything together with your hands until well incorporated. If you want to test a small amount in the fry pan to see if you need to add any additional ingredients, now is a good time to do so! Once you are happy with your mixture, set aside.
      5. To make dumplings, place roughly half to one Tbs of filling in center of dumpling wrapper. Using a small bowl of water, dab your finger with some water and lightly wet all around the edges of the dumpling skin. This will allow you to press the dough together, and have it stick. Without the water, the dumplings will not seal, and you will lose your filling.
      6. To crimp your edges, bring the center of the dumpling together, and pinch the top edges together gently to begin the seal, creating a half moon shape. Keeping the back flat, you want to work the excess dough on the front into pleats so your filling is tightly packaged. I have a video on how to do this below.
      7. This is not typical, but I like to create 3 pleats on either side of center pinch, folding in opposite direction. It creates a pretty, symmetrical looking dumpling. I think they are typically pleated in one direction, but I was a clothing designer for 25 years, so this is just how my hands and mind work! 😉
      8. It is a little awkward making these at first. Eventually, you’ll get the hang of it and your muscle memory will kick in! Don’t worry if they are not perfect looking or a little ugly at first; it’s all about how they taste, and even if they are not crimped properly, they’ll be delicious! Some people just pinch and seal the edges; that totally works too. No rules, just fun!
      9. Once your dumplings are all sealed and ready to go, heat 1-2 Tbs of olive oil on a medium to high flame for a minute or two. Add about 25 dumplings to the pan at once. It’s ok to crowd the pan at this point. Not a problem if your dumplings stick together a bit too.
      10. Once all the dumplings are in the pan and frying, you want to make sure they are all getting nicely browned. Once you see that they have a nice color to them, and are properly seared, you want to add about 1/2c of water to the pan and cover. This will allow the dumplings to steam and cook the wrappers and fillings.
      11. After a few minutes, you’ll notice dumpling wrappers are hugging the filling, are slightly translucent, and almost all of the water has evaporated. You want to check that the bottoms are not burnt. At this point, you can take the dumplings off the heat, and serve!
      12. (I only made 25 dumplings, and will use the rest of the mixture to make some burgers today)!
      shallots browning
      1 pickle chopped
      Adding it all in!
      In with the bacon and cheese!
      All mixed together and ready to make some dumplings!
      wet the wrapper all around the edges with water on your finger
      1 Tbs or less of filling in the center
      beginning to pleat one side
      Once dumplings are made, load about 25 in pan with hot oil, or as many as will fit.
      No need to social distance here!
      bottoms will begin to brown
      add water and cover to steam
      dumplings will begin to cook through, becoming translucent
      sometimes you just need to taste one to make sure it’s cooked!
      ready to eat! who’s hungry??

      Click the link below to add to your Yummly Recipe Box!

      Yum

      Posted in Uncategorized | 0 Comments
    • The “I Accidentally Ate the Whole Loaf” Potato Bread

      Posted at 3:39 pm by pinchdollop, on June 4, 2020

      When I tell you this bread is so good, I “accidentally” ate an entire loaf yesterday, I am not joking! Needless to say, I am not feeling so amazing today, but if you can restrain yourself or you have more than two people in the house, (or you really just want to try this deliciousness) definitely make this bread! It is super easy and I cannot describe how light and fluffy and just plain amazing it is! You will thank me, I promise!

      Part of the process of when you begin Intuitive Eating is giving yourself permission to eat literally anything. It’s a struggle for me some days, honestly. I have been restricting for so long. And, I do really well with super tight rules (and then breaking them). What I don’t always do so well with when it comes to eating is freedom. And, since I started this process at my highest weight in years, it is really playing a number on my brain letting myself eat. I have been dieting since I was 8; this goes against everything I know to do!

      And, that’s why you see so many bread and cake and carb posts lately. I’m in the beginning part of the journey where I go through eating whatever I want. For me, that is all the fluffy, amazing breads and desserts I have been saying no to for years. But, after yesterday where I binged on this insane potato bread, I am so tempted to race back to my previous ways and jump on the fastest, sure fire way to shed the bloat and lbs I have gained since starting this new way about a month ago. I have been thinking all night about the diet I am going to secretly start today, and have been planning how I am going to break up with my therapist as well. I am just tired of feeling like this. I even weighed myself this morning and was shocked by the number.

      I know this is part of the process, and while the food eating is the fun part, dealing with what I have done to my body for so long by dieting kind of sucks! And, now I am so grateful for this blog. Because, as I write this, it is giving me the pause I need to understand this is part of the process and I cannot simply run back to my old ways; that is how I got here in the first place! I need to tap into the feeling that eating an entire loaf of bread provides: that gross, uncomfortable bloated feeling, and stop demonizing the bread. My body needs freshness and things that are alive, and that is what I will give it next.

      If you have been through this rollercoaster too, I would love to hear from you! I am flying solo on this journey (with the help of my therapist), but I would love to hear from people who have been through this and it worked for them! Just knowing this process works would help me so that I can continue to help others by sharing my journey!

      I used this recipe from the Devour blog, and adjusted it slightly.

      Ingredients:

      • 1 large or 2 small Yukon gold potatoes, peeled and cubed (I actually used russet and red potatoes I think, not sure the exact variety. It’s what I had from our farm box)
      • 2 1/2c cool water
      • dash of salt
      • 1 T dry active yeast
      • 2 Tbs butter
      • 1 Tbs course salt
      • 2 Tbs granulated sugar
      • 3-5c all purpose flour

      Directions:

      1. In a small sauce pan, bring potatoes and water to a boil. Add a sprinkle of salt. Cook until potatoes are tender, 15-20 minutes. Do not drain. Reserve 1/4c of the cooking liquid.
      2. Mash potatoes in remaining liquid and stir in butter. Let butter melt into liquid, and cool to lukewarm. Don’t worry if you end up with big lumps in the mash. I had some pretty large chunks in the dough, and it didn’t matter.
      3. Dissolve yeast in 1/4c reserved liquid and let stand for 5 minutes, until foamy.
      4. In a large bowl, combine mashed potatoes, yeast liquid, sugar and salt. Add 3 cups of flour and stir until a dough begins to come together.
      5. Knead dough until smooth. Recipe says to add up to 2 more cups of flour. I’m not sure how much I put in, maybe 1 c more. I just kept sprinkling a little on the top and bottom to keep the dough from sticking to the bowl. You just need to feel out your dough to see how much it will need at the time.
      6. Transfer dough to an oiled bowl, cover with a dish towel, and let rise until doubled in size, about an hour.
      7. Grease or spray two 9×5 inch loaf pans. I use silicone pans, and so you do not need to grease silicone.
      8. Punch down dough and divide into 2 equal pieces; recipe says to form into loaves, but really all you need to do is place dough along bottom of pans. The next rise will do the rest. Cover pans again with a dish towel and let rise another 30 minutes, or until doubled.
      9. Preheat oven to 375 degrees F and place a rack in the bottom third of the oven. Uncover loaves and bake for 35-45 minutes, until the tops are golden brown and sound hollow when tapped.
      10. After a few minutes, I removed my loaves from the pan to check they were done, and found a surprising golden color all the way around. I let cool a little while longer on the cooking sheet without the pans, and then sliced in with some butter. Enjoy!
      Peeling the red potatoes: save the scraps! I used them and made hash browns and they were delicious! Will post recipe for that too!
      Russet Potatoes? Cannot remember; I used both kinds
      Scraps saved for hash browns!
      I boiled all of these, planning to use for another recipe. You only need the amount for one large potato for this one.
      Before the Mash
      And after. Don’t worry about the chunks!
      Melting the butter into the liquid. You might need to mash it up a bit.
      After adding the yeast liquid. Sorry, I forgot to photograph what that looked like!
      Adding the first 3 cups of flour.
      Dough starting to come together.
      Making the switch to mixing with hands!
      Coming together.
      Almost there!
      Getting ready to rise!
      Covered
      Dough has doubled. Punch down the center. (see all the little potato bits? Doesn’t matter)
      Divide in Half
      Placing dough in loaf pans.
      2nd cover
      They’re huge, and ready to go!
      Holy crap it’s exciting to see bread come out of the oven!
      Golden Brown Delicious All Around
      Posted in Uncategorized | 1 Comment | Tagged #bestbread, #binge, #eatthecarbs, #food, #foodblog, #iatethewholething, #intuitiveeating, #journey, #nomnomnom, #potatobread
    • Lemon Strawberry Yogurt Loaf

      Posted at 5:07 pm by pinchdollop, on June 3, 2020

      You know those days when the fruit or veggies are just sitting in your fridge, taunting you? You know you should eat them before they go bad, but every time you open the door, you just grab something else?

      That’s me with these strawberries. I just couldn’t do it! Every damn time. We buy our produce straight from the farm, so things have a very short shelf life, which I love usually. It forces me to get inventive with ingredients, but some days are a struggle. And, I hate throwing really good seasonal produce away.

      Hence, the Strawberry Lemon Yogurt Loaf. Kill 3 birds with one stone, and you get a really tasty snack or breakfast! I used a recipe from Yay! For Food, and it is pretty great. I adjusted slightly, as I always do, and next time I would up the lemon factor because we like our lemon sweets pretty packed with lemon punch over here. As it is now, it is a little more subtle, so adjust your recipe accordingly if you want more of a zing! (I also skipped her drizzle- which may have added that extra lemon kick).

      Ingredients:

      • 2c all purpose flour
      • 1/2c sugar
      • 1 lemon, zested (I would use 2 lemons if not using glaze)
      • 1 tsp baking soda
      • 1/4 tsp salt
      • 1 1/2c fresh strawberries, green parts and core removed, chopped (reserve 1-2 strawberries and slice for top instead of chopping).
      • 1c unflavored yogurt of your choice
      • 1/2c unsalted butter, melted
      • juice from 1/2 lemon (I would do the whole lemon if not using glaze)
      • 1 egg
      • 1/2 tsp vanilla extract
      • sprinkle of turbinado sugar for top
      • sprinkle of rolled oats for the top

      For the Glaze (I omitted, but you might want to do for yourself)

      • 1/2c sugar
      • juice from 1/2 lemon

      Instructions:

      1. Preheat oven to 350 degrees F. Line a 9×5 loaf pan with parchment paper if using metal or glass pan. I use silicone baking pans, which I don’t love, as they tend to lose their shape when baking. But, it’s what I have! If using silicone, you don’t need parchment or anything to grease the pan.
      2. In a large bowl, whisk together the flour, sugar, lemon zest, baking soda, and salt until well combined. Gently fold in the chopped strawberries so the strawberries are covered with the flour mixture. Set aside.
      3. In another bowl, whisk together the yogurt, butter, lemon juice, egg, and vanilla extract until creamy and uniform in appearance. Then, pour the wet mixture into the dry ingredients.
      4. Fold the mixture together until the batter is just combined (you no longer see dry ingredients and the dough will look a little raggedy, thick, and not completely smooth).
      5. Knead the dough a few times; do not overtax. Place dough into loaf pan, top with sliced strawberries (push them gently into dough) and sprinkle with sugar and oatmeal.
      6. Bake for 45-65 minutes, or until a toothpick or fork inserted into center comes out clean.
      7. If you are making the glaze, these are the instructions. I do not know what the result is, so comment below if you make it and let me know how it turns out for you! As the bread bakes, whisk together the lemon juice and sugar until well combined.
      8. After the cake is ready and still hot, poke holes using a wooden or metal skewer or the tip of a knife into the top of the bread and pour the glaze over it.
      9. Let the bread cool slightly in the loaf pan before eating. Best enjoyed the same day it’s baked.
      Chopped strawberries getting coated.
      Strawberries completely covered.
      All mixed in.
      Ready to Bake
      Warm and Delicious!

      Posted in Uncategorized | 3 Comments
    • Dressed Up Caprese Salad

      Posted at 9:13 pm by pinchdollop, on June 2, 2020

      Whomever stuck a hunk of cheese with some tomatoes Basel and called it a salad, I love you! Seriously, I was vegan for several years in the past, and cheese was really the only thing I ever missed or was shocked I was able to go without. It really is from the gods!

      This Caprese Salad is super easy and delicious. For those of you that have never tried it, you really must. It’s idiot proof, so refreshing, makes an amazing lunch or dinner starter (and sometimes I eat this for breakfast)!

      You can make it super fancy and elegant, or serve it really simply. Whatever goes. You just really want to use the best cheese you can afford, because it does make a difference. The fresh ball of mozzarella is exponentially better than the fake stuff from the grocery store, and they sell both. But, splurging the extra dollar or two, if you can afford it, is so worth it. And, if you have never had burrata, you DEFINITELY need to try this. Trust me, if you are throwing a party, buy the Burrata. You will thank me!

      When making something really simple, you want the best ingredients you can find. Because you will taste it! A mealy tomato will definitely taste like a mealy tomato in this, so you want to make sure you get a really delicious, ripe juicy one. I personally love the dark green/red heirlooms when they are in season (sometimes I will eat one by itself with some salt or avocado as a meal). Save the mealy ones if you have them for a sauce or stew.

      And, lastly, truffle salt and balsamic reduction. Truffles had a moment for awhile, and lots of people love or hate them. I personally love them, and use the salt when I can, instead of the oil. Most chefs laugh at truffle oil, but I think it can be great on pizzas and other dishes, depending on what that they are.

      Balsamic reduction: you can make this by slowly simmering balsamic by itself on the stove until it thickens (you can add a little sugar if desired to lessen the acidity), but I personally love buying a really delicious reduction that is already made to save time. Trader Joe’s has a great one that is not too expensive and I use it on savory and sweet dishes. It goes great on roasted or sautéed onions, with fruit, on ice cream; lots of ways to use this deliciousness.

      Ingredients:

      • 1 large ripe tomato
      • 1 ball mozzarella or burrata
      • ~6 leaves basil
      • high quality olive oil
      • balsamic reduction
      • truffle salt, to taste

      Directions:

      1. Slice the Tomato into thick slices. About 1/2″-3/4″ is generally a good size.
      2. Slice mozzarella ball into matching slices. You roughly want each tomato slice to have an equal slice of cheese and basil. If you are using the ball of burrata, don’t slice it before hand; Place in the center of the plate, dress as you would the full salad, and let your guests cut into it for the drama of the oozing creme fraiche inside.
      3. Place your tomato and cheese on a plate, alternating cheese and tomato. Top with basil.
      4. Drizzle good quality olive oil, balsamic reduction, and truffle salt to taste along all components on the plate. If serving burrata, drizzle on the top of that too, and you will get all of the flavors mingling when cut.
      5. Serve and enjoy!

      To add this recipe to you Yummly Recipe Box, Click the Yum Below:

      Yum

      Posted in Salads, Side Dishes | 0 Comments
    • Crunchy Bok Choy Salad

      Posted at 6:18 pm by pinchdollop, on June 1, 2020

      Using Culinary Hill’s recipe for this unusual salad using uncooked ramen noodles and raw bok choy, I changed it up a bit to suit my needs and tastes. Super flavorful and delicious, it makes for a really awesome light lunch or side dish for dinner.

      I have a handful of killer salad recipes, and this one will definitely be added to the rotation. I subscribe to a weekly CSA Farm Box, and this week’s fresh veggie selection came with a few small heads of boy choy. This is one of those greens I just cannot get into for stir frys and soups, and I had no idea what to do to use these until I came across this recipe.

      Crunchy and delicious with the umami of the dressing, the cruciferous boy choy makes a great salad base because it will not wilt like lettuce does, and so you can enjoy leftovers of this salad where the dressing will continue to deepen in flavor as it sits!

      Ingredients:

      For the Salad

      • 6 small bulbs boy choy, finely sliced
      • 1-2 scallions, sliced
      • 1 small cucumber, chopped
      • 1-2 radishes, chopped
      • 1 small avocado, diced
      • 3 Tbs sesame seeds
      • 1/4c peanuts or nuts of choice
      • 1 package dry ramen noodles (no seasoning packet)
      • (You can use any combination of fresh veggies you want, so feel free to add any additional ingredients you love: fresh corn, tofu, bell peppers, onions, carrots, etc)

      For the Dressing

      • 2 Tbs light brown sugar
      • 1/4c olive oil or toasted sesame oil
      • 2 Tbs red wine vinegar
      • 1 Tbs rice vinegar
      • 1 tsp chili oil (omit if you don’t like any heat. This just gives a slight heat, but not necessary)
      • 1 Tbs soy sauce or Tamara

      Instructions:

      1. Break or crush up ramen noodles into small pieces. Place on a baking tray with peanuts and sesame seeds and spray with oil mister or cooking spray.
      2. Place tray in 350 degree oven for a few minutes until nuts, seeds and noodles are brown and toasted. Make sure to check often so they do not burn.
      3. Set tray aside to cool while you are making dressing.
      4. Combine all of dressing ingredients in bowl and let sit while chopping vegetables.
      5. Chop and combine all veggies and toss together in bowl. Add in cooled noodles, nuts, and seeds, coat with dressing, and toss all together. Enjoy!
      noodles, seeds and nuts toasting in the oven
      flavors of dressing will come together while sitting
      chopping all together
      all the veggies
      crunching it up
      Posted in Uncategorized | 0 Comments
    • Easy English Muffins

      Posted at 4:51 pm by pinchdollop, on June 1, 2020

      I borrowed this recipe from Truffles and Trends after watching Jennifer Garner make these on her #pretendcookingshow. Honestly, I am a little obsessed with that show and how adorable she is! Jennifer made it look so easy and so awesome, I decided to give it a try, and so happy I did!

      This is an amazing way to make a quick bread that doesn’t involve a million proofing sessions, and I could do it in the morning before anyone was awake. I am taking care of my mom while we’re quarantining, and she loves a delicious bread or pastry option in the morning, so this is a perfect starter!

      I need to take more pics next time I make these, and I’ll update this post to add the steps in, but what you cannot see in this pic is how light and fluffy they are, and so buttery and delicious! I could not stop eating them when I made them, and I had two myself before she even woke up! I had to freeze half of the batch so I wouldn’t eat the whole batch in a day! Trust me, you will never buy store bought English Muffins again once you have these!

      Recipe says it makes about 10 English Muffins, but I think I got about 12 out of it, maybe more. So, you can make them a little smaller and stretch it, up to you!

      Ingredients:

      • 1 1/4c warm water
      • 1 Tbs sugar
      • 1 tsp instant dry yeast
      • 2 Tbs melted butter or oil (I used butter)
      • 2 3/4c all purpose flour
      • 1 tsp salt
      • cornmeal for dusting (I didn’t have any, so I sprinkled my muffins with sesame seeds when frying)

      Directions:

      1. Pour warm water into a large bowl; sprinkle sugar then yeast on top.
      2. Let sit and foam for 10 minutes.
      3. Add in melted butter/oil, flour, and salt and mix with a wooden spoon or rubber spatula.
      4. Once combined, drop dough onto a floured surface and knead by hand for 5 minutes, adding flour if needed to keep dough from sticking to surface. (You can probably knead in a stand mixer as well, but I did it by hand).
      5. Shape the dough into ball and place into an oiled bowl (I like to use an oil mister with olive oil). Cover with a dish towel and let rise for one hour, or until doubled in size.
      6. If you are using cornmeal, sprinkle a few tablespoons on a piece of parchment paper or towel.
      7. Once dough is doubled, knead a few times on floured surface and divide into 10 (or 12) portions. Shape each piece into a ball and then flatten onto cornmeal covered parchment to create muffin shape.
      8. Sprinkle all of the flattened muffin shapes with more cornmeal (or sesame or poppy seeds) and then cover with dish towel and let rise for 20 minutes.
      9. Heat a large frying pan or skillet and grease. Recipe says with cooking spray, but I used butter. I think it was worth it; made the dough super luscious and flavorful. Recipe says to cook on low heat 9 minutes first side and 5 minutes opposite side. I found I needed more time than that, so you might just want to watch the first batch or two and check for yourself. You want the bottom super golden and delicious, and the inside fluffy and moist. I also covered mine while they were cooking to steam a little bit.
      10. Once cooked, you can split the steaming muffin with a fork, and add. butter or jam and all your favorite toppings. I made an insane burger the next day and used this as my bun. It was rediculously good!
      Posted in Uncategorized | 0 Comments
    • Ooey Gooey Maple Bacon Pecan Sticky Buns

      Posted at 8:50 pm by pinchdollop, on May 30, 2020

      Have you ever met anyone who doesn’t like bacon? Ever? I actually know some vegetarians who sneakily eat bacon! And, while it’s fine if you don’t eat it for sure, it’s just a given that bacon makes just about anything taste better.

      That goes for these insanely delicious sticky buns! It’s not a lot, so if you are a little skeptical, just know it adds just a hint of salty umami that makes these so decadent and special. I personally love salty and sweet mixed together, and these hit that sweet spot, pun intended!

      The best part about these too, is that you don’t have excessive proofing and waiting, so you can make them all in one day, unlike a lot of tricky recipes I have seen. And, if you don’t want to do them this way, you can also switch it up and use the versatile dough for other sweet or savory recipes. I have used it for both, and it comes out incredible every time!

      Last proof before baking!

      Sometimes I split the dough and make half savory and half sweet, so I have dinner and dessert, or breakfast for the morning!
      Great for a brunch staple that is easy to make and super impressive!
      Mix and match ingredients.
      Super lovely dinner or brunch!

      Ingredients for Dough:

      • 1c warm milk
      • 1 Tbs instant dry yeast
      • 2 Tbs granulated sugar
      • 1 tsp salt
      • 3 Tbs salted butter, softened
      • 1 large egg
      • 3c all purple flour

      Ingredients for Bacon Candy:

      • 8 slices thick slab bacon
      • ~1/4c dark brown sugar (enough to sprinkle over bacon)
      • 1 T maple syrup

      Ingredients for Filling:

      • 1/2c salted butter, softened
      • 1c dark brown sugar
      • 2 Tbs ground cinnamon
      • 1-2 Tbs maple syrup
      • pinch of salt

      Ingredients for Topping:

      • 1c heavy cream or half & half
      • 3/4c brown sugar
      • 4 Tbs maple syrup
      • 2c pecans, roughly chopped or left whole

      Instructions:

      1. In a large bowl (if mixing by hand) or in the bowl of a stand mixer, combine warm milk, yeast, sugar, salt, butter, and eggs. When combined, add in flour and mix on slow speed or bring together with a wooden spoon.
      2. Once the flour starts to incorporate into the dough, bring the speed up to medium in the mixer. If mixing by hand, you can use your hands and knead the dough in the bowl until the dough comes together (you might need additional flour to get there). Dough should be soft and somewhat tacky, but not stick to your hands.
      3. Once you have reached this consistency, transfer the dough to a lightly greased mixing bowl (I like to use olive oil in a misting spray or oil spray from the store for even coating). Cover bowl with dish bowl and let rise about an hour, or until the dough has doubled in size.
      4. While the dough is rising, cook bacon in a fry pan until crispy on both sides. Drain fat from bacon (reserve to use for another dish or discard), and bring bacon back to pan. Sprinkle bacon with ~ 1/4c brown sugar (you can use less, you just want enough to cover and caramelize) and about 1T maple syrup just for flavor, and continue to cook until sugar melts and starts to bubble. Make sure to do this on both sides. Let bacon cool and form a candy. Once cool and brittle, break into small pieces and set aside. You can leave the bacon in the pan to use later and mix the topping there to save dish time and also to get all the little bits of sugar, bacon fat and flavor from the pan.
      5. At this point, you want to grease whichever baking surface you are using with either butter or cooking spray. I like to use a metal muffin tin for these to make somewhat uniform in size and for easier portioning, but you can also do all together in a baking dish as well. If you are using the muffin tin, you will get 24 sticky buns, but if you want to make the buns thicker and larger in size, you can do that when making in an open dish like a brownie pan or glass baking dish.
      6. To make filling, combine softened butter, brown sugar, cinnamon and 1-2 Tbs maple syrup to form a paste. Set aside.
      7. Punch down dough. If using a muffin tin, cut dough in half. If using an open baking dish, you can use full amount at once. Simply repeat the following steps for the duplicate dough for the muffin tins.
      8. Roll out your dough to 12″x18″. I like to use the back of a cookie sheet as a rough idea of size. You don’t have to be exact, but you want to be as uniform as possible and get the dough as close to the edges as possible without getting too thin. If any pieces rip, just press back together.
      9. Smear 1/2 of the filling onto the dough if using the muffin tins, or the full amount if using the open dish, evenly spreading the filling all the way to the edges of the full amount of dough. Sprinkle half of the bacon candy evenly distributed throughout the dough.
      10. Roll the dough in a pinwheel away from you, doing a little at a time in sections, and making sure to keep the rolled dough as even as possible. It really doesn’t have to be perfect.
      11. Carefully move dough to center of baking tray or floured surface, and cut in 12 even pieces. If making in muffin tray, repeat steps 8-10 until you have 24 uniform rolls.
      12. In pan with remaining bacon candy, add all of topping ingredients to pan and stir until incorporated. Do not heat, simply use fry pan as mixing dish.
      13. Spoon each muffin tin with 1-2 spoonfuls of topping mixture, enough to coat the bottom and fill the first 1/4 of the tin. If using a single pan, simply pour all ingredients onto bottom of dish.
      14. Preheat oven to 325 degrees. Place one roll into each tin of muffin tin or evenly spaced in baking dish, and cover with a towel to rise for 30-45 minutes.
      15. Bake the rolls for about 14 minutes, or until brown on top.
      16. Let cool on a wire wrack for 10 minutes and then place a serving dish over the baking dish and flip. You might have to gently shake, but buns should come out easily, and as you remove the baking dish, all the gooey delicious topping should ooze out and fall all over the top, dripping down each bun and creating that amazing sticky, caramelized texture.

      These can be enjoyed hot out of the oven with a scoop of ice cream, a dollop of whip cream, or just by themselves. They work great room temperature as well, and even freeze great to enjoy later. Simply pop into the microwave for 30 seconds and they are just as good as when you first made them!

      For savory buns, I simply baste the dough with butter and spices, sprinkle with cheese, and use an array of fillings, from provolone and olives, to ham and cheddar, to sautéed greens and parmesan. There are endless possibilities!

      To add to your Yummly Recipe Box, click the Yum Below:

      Yum

      Posted in Breakfast, Desserts | 0 Comments
    • Whole Grain Flat Bread

      Posted at 5:33 pm by pinchdollop, on May 29, 2020

      There is literally nothing better than the smell of fresh bread: baking, frying, even just the yeast of the dough when it’s rising in the kitchen smells delicious! And, since the stay-at-home order started here in NYC I have been making a wide variety of breads and pastries that I have been too scared to try. Knowing how easy they are now, I’m a little disappointed I waited so long to try my hand at them, as I am having a blast coming up with these recipes and tasting everything!

      I hate buying bread that has all kind of weird ingredients- stabilizers, dough conditioners, all kinds of sugars and unpronounceable names, so being able to control what goes into the bread, and making it fresh, I know it will always be delicious, even if I mess up sometimes. And, when making it for other people, I feel good knowing what is in what I am making and we’re all eating!

      For this flat bread, I started with a basic recipe and adjusted it. I’ve been eating lots of plain white breads lately and have become a little bored, and was looking to add something more interesting to the everyday, and also sneak a little more nutrition in!

      I’m working on remembering to take more pictures as I go, but I started halfway through on this one. Bear with me, I’ll start to get the hang of it!

      Ingredients

      • 1c warm water
      • 1 Tbs sugar
      • 1 Tbs active dry yeast
      • 1 tsp salt
      • 3 Tbs olive oil
      • 1c oat flour
      • 1 1/2c all purpose flour (will need more for dusting)
      • 1/3c 7 grain seed mix

      Instructions

      1. Combine the water, sugar, and yeast in a small bowl; stir, and let sit for 10-15 minutes. Yeast should bubble up and foam.
      2. While yeast is activating, combine flours in a large bowl. You may need more flour, depending on the environment conditions. You can always add more, so best to start with the 2 1/2c total and add as needed.
      3. Pour in the yeast/water mixture, add the salt and oil, and stir together with a wooden spoon until a dough forms. Dough will be sticky to the touch, but should come to a general ball formation fairly quickly and come away from sides of bowl.
      4. Scrape all dough off spoon, and place on a lightly floured surface. Knead by hand, adding flour to surface and dough as needed, until the dough is slightly sticky, but somewhat elastic. It should take about 2-3 minutes.
      5. Place in an oiled bowl (I used olive oil in a misting spray) and cover with a dish towel. Make sure the bowl is at least 2-3 times the size of the dough so it has room to grow.
      6. Let rise for 1 hour.
      7. Punch down dough, and divide into 8 pieces. Some people like to make their dough into balls to roll out round, but I kind of love the look of a rustic free form shape, so that’s how I make mine.
      8. Cover dough and let rest for ten minutes.
      9. Heat griddle or heavy skillet over medium high heat. I like to use a cast iron skillet. I really like the way it heats and provides an even high temp all around, and like cooking on stone, it really helps create those beautiful little brown spots!
      10. Roll dough as thin as possible in whatever shape you like, making sure the diameter of the dough is the same size or smaller than the pan.
      11. Spray oil of choice or place a small pat of butter in the pan and gently place dough onto pan and let cook for about 2-3 minutes, or until browned. You will see small bubbles form as dough is cooking on the top; these will provide the lovely scorched bits that are so signature to flat bread. If you prefer to avoid these, you can flip when just golden brown.
      12. Once you notice dough is cooked, spray with oil and flip to cook other side.
      13. Repeat until you have finished all 8 pieces.
      Greased bowl before rising.
      Dough has at least doubled in size.
      Separating dough into portions. A dough scraper is an amazing tool!
      Cute little sections of pillowy goodness!
      Rolling out the first piece!
      Look at all those bubbles!!!!
      Golden bits of deliciousness!
      Building a stack.

      You can use these little canvases for anything you like. Pizzas, sandwiches, wraps. Savory or sweet. They can really go anyway. Nutella and bananas or hummus and veggies, really anything you can dream up!

      Today we had tuna club sandwiches. I placed a single pieces of bacon, tuna salad, and 1/4 of a sliced avocado, and wrapped it all up! So amazingly delicious, you will never buy store bought tasteless wraps again after you try these! (And, after you make them, you can freeze whatever you won’t eat now and enjoy as you are ready. Simply heat in the toaster oven and enjoy)!

      To add this to your Yummly Recipe Box, click the Yum Below:

      Yum

      Posted in Uncategorized | 2 Comments
    ← Older posts
    • Recent Posts

      • Cheesy Savory Quarantine Hash
      • Best Intentions
      • Bacon Cheeseburger Dumplings
      • The “I Accidentally Ate the Whole Loaf” Potato Bread
      • Lemon Strawberry Yogurt Loaf
    • Recent Comments

      Lemon Strawberry Yog… on Lemon Strawberry Yogurt L…
      Stacey on The “I Accidentally Ate…
      pinchdollop on Lemon Strawberry Yogurt L…
      Meenal Jhala on Lemon Strawberry Yogurt L…
      pinchdollop on Whole Grain Flat Bread
    • Archives

      • June 2020
      • May 2020
      • November 2013
      • October 2013
    • Categories

      • Breakfast
      • Cooked Fruit Recipes
      • Cooked Veggie Recipes
      • Desserts
      • Main courses
      • Nuts and Seeds
      • Raw Fruit Recipes
      • Raw Veggie Recipes
      • Salads
      • Side Dishes
      • Smoothies
      • Uncategorized
    • Meta

      • Register
      • Log in
      • Entries feed
      • Comments feed
      • WordPress.com

Blog at WordPress.com.

A Pinch and a Dollop
Blog at WordPress.com.
  • Follow Following
    • A Pinch and a Dollop
    • Already have a WordPress.com account? Log in now.
    • A Pinch and a Dollop
    • Customize
    • Follow Following
    • Sign up
    • Log in
    • Report this content
    • View site in Reader
    • Manage subscriptions
    • Collapse this bar
 

Loading Comments...